

MAKE YOUR OWN LAWN DICE GAME WITH 3D PRINTED DOTS
Yard games are a great way to get together with friends and family and celebrate these last few days of summer outside. Of course anything bigger is always better, and these large scale lawn dice are a perfect way to while away the afternoon. There are different variations of yard dice, but most typically all games require at least 5 die to play such as yahtzee or bar dice.
WHAT YOU’LL NEED:
-
Approximately 20″ of a 4×4 post preferably white pine or cedar
-
105 – #6 x 1″ long wood screws – color black
-
5/8″ diameter spade drill bit and a drill or a drill press is preferred
-
Chop saw
-
Belt sander or detail sander
-
105 – black 3D printed dots, see below to download
Template
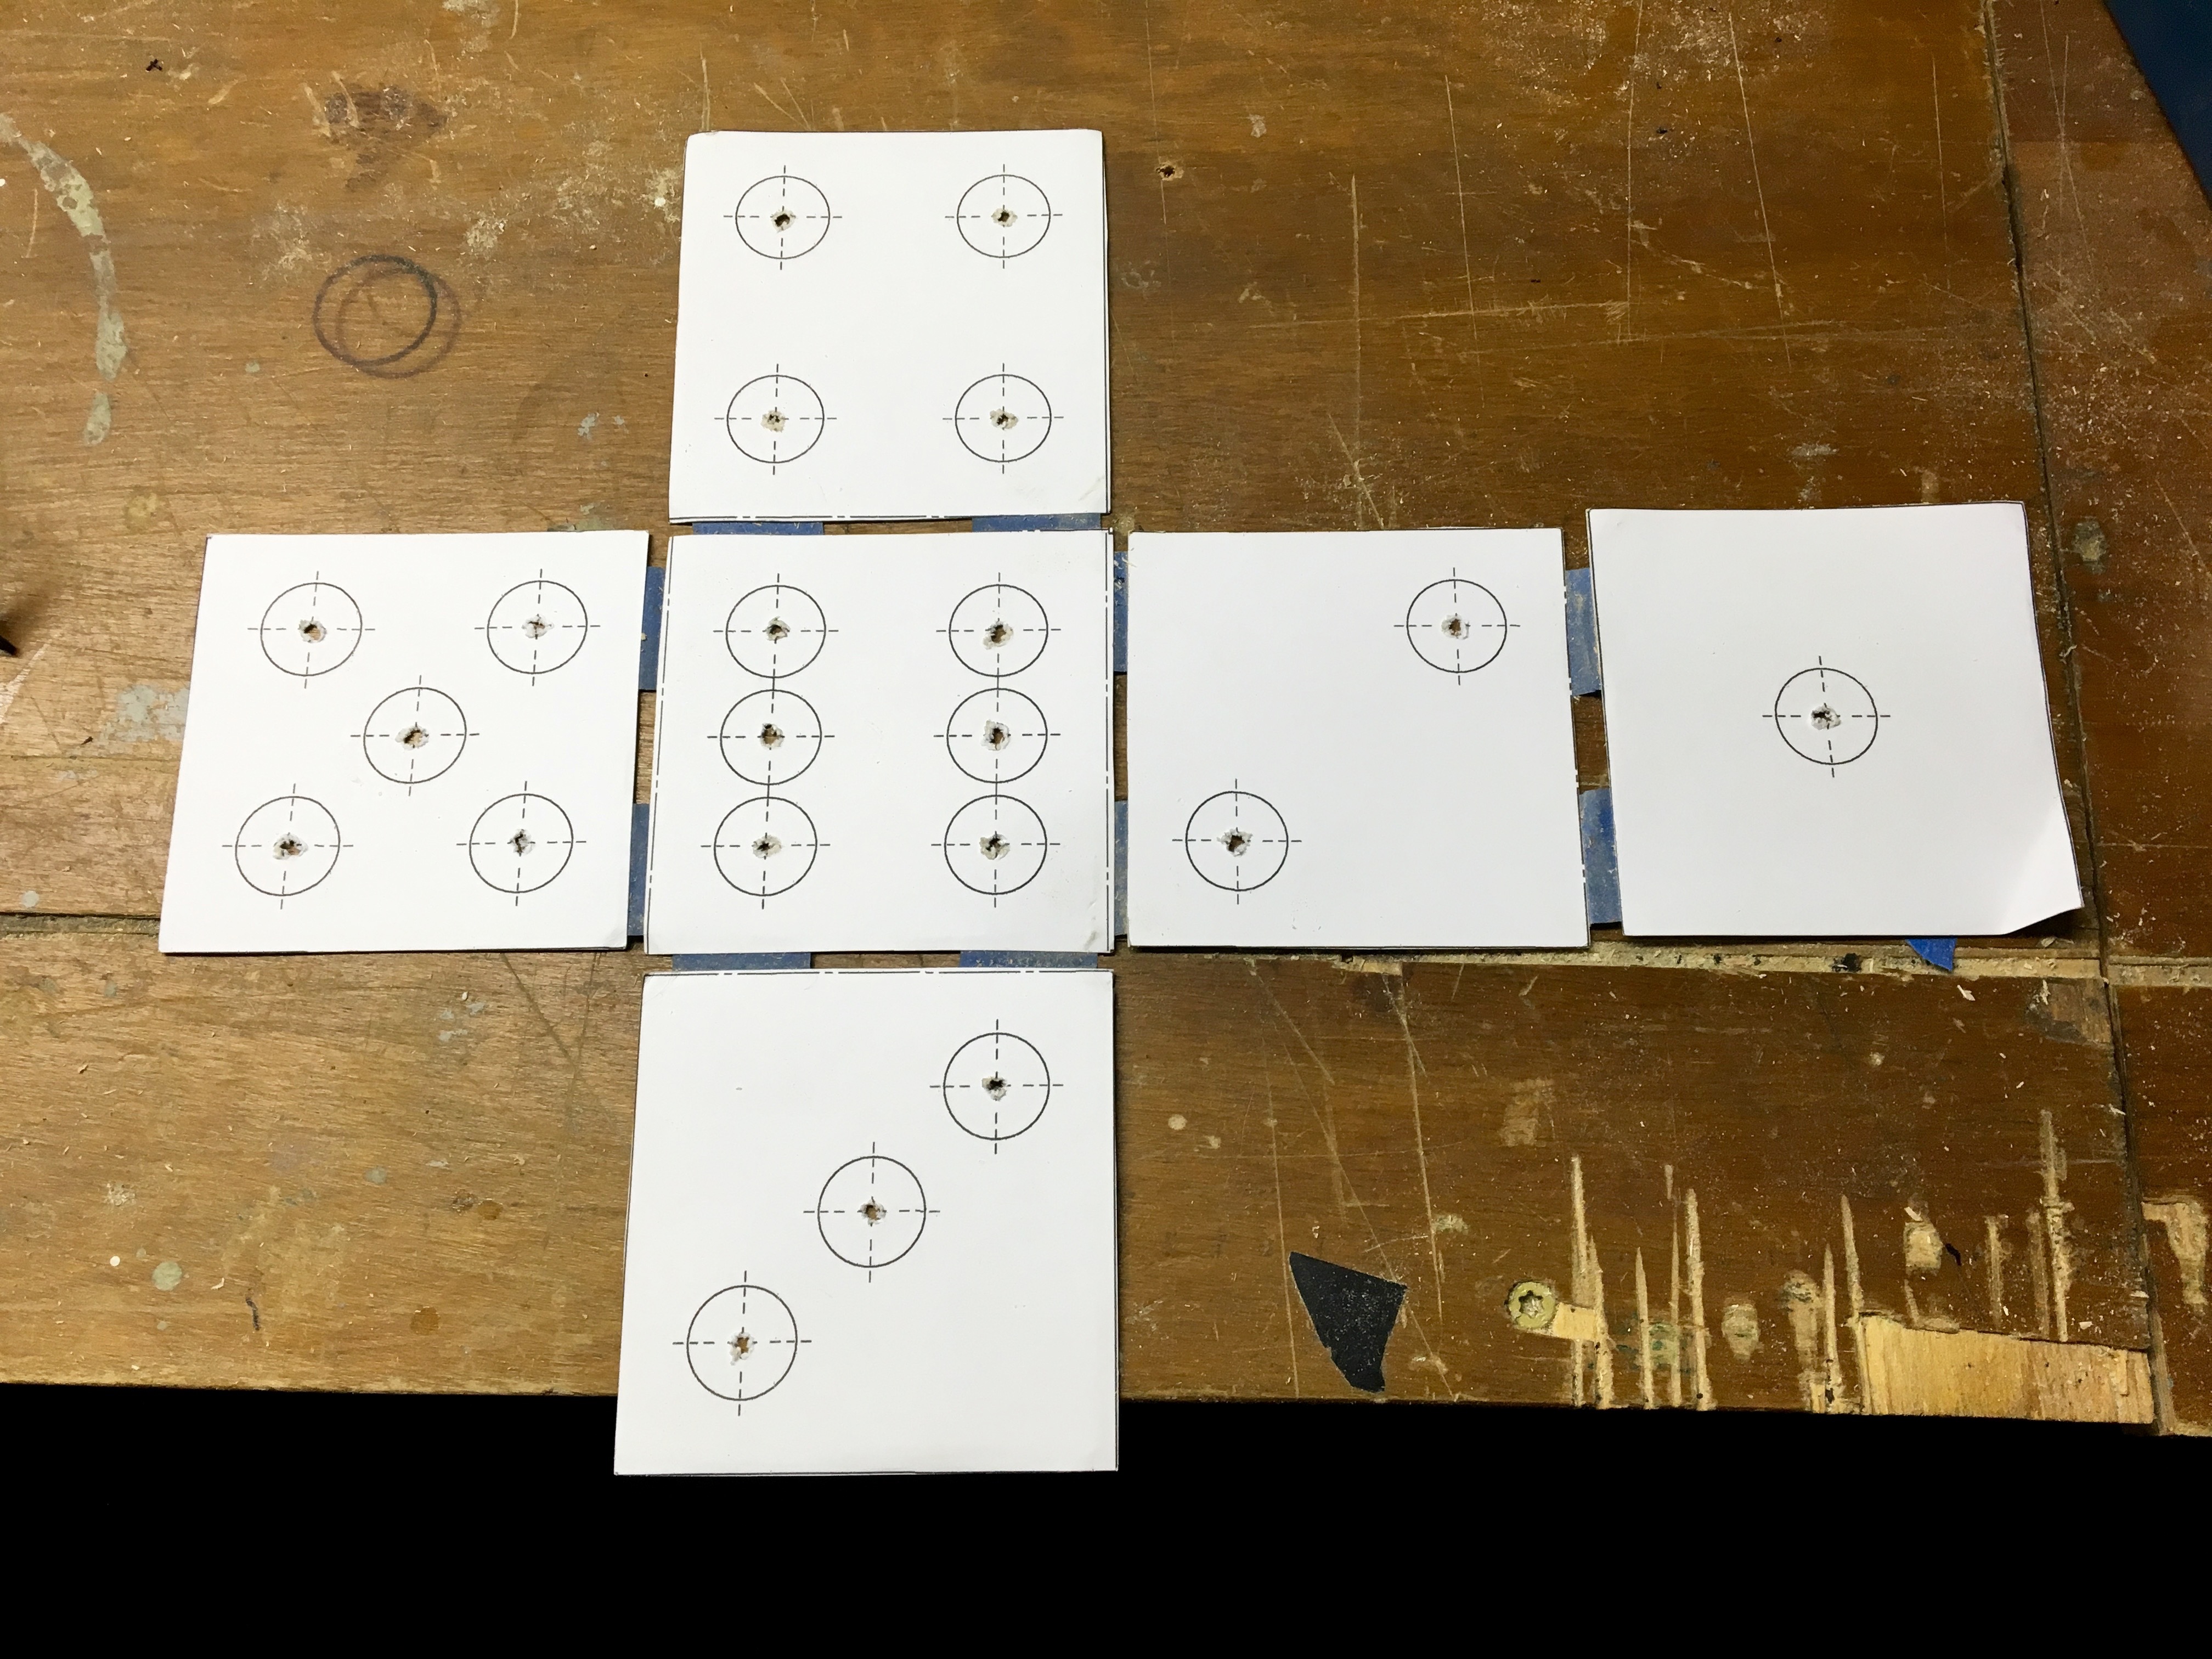
Print and Cut out dice template, tape together spaced 1/8″ apart
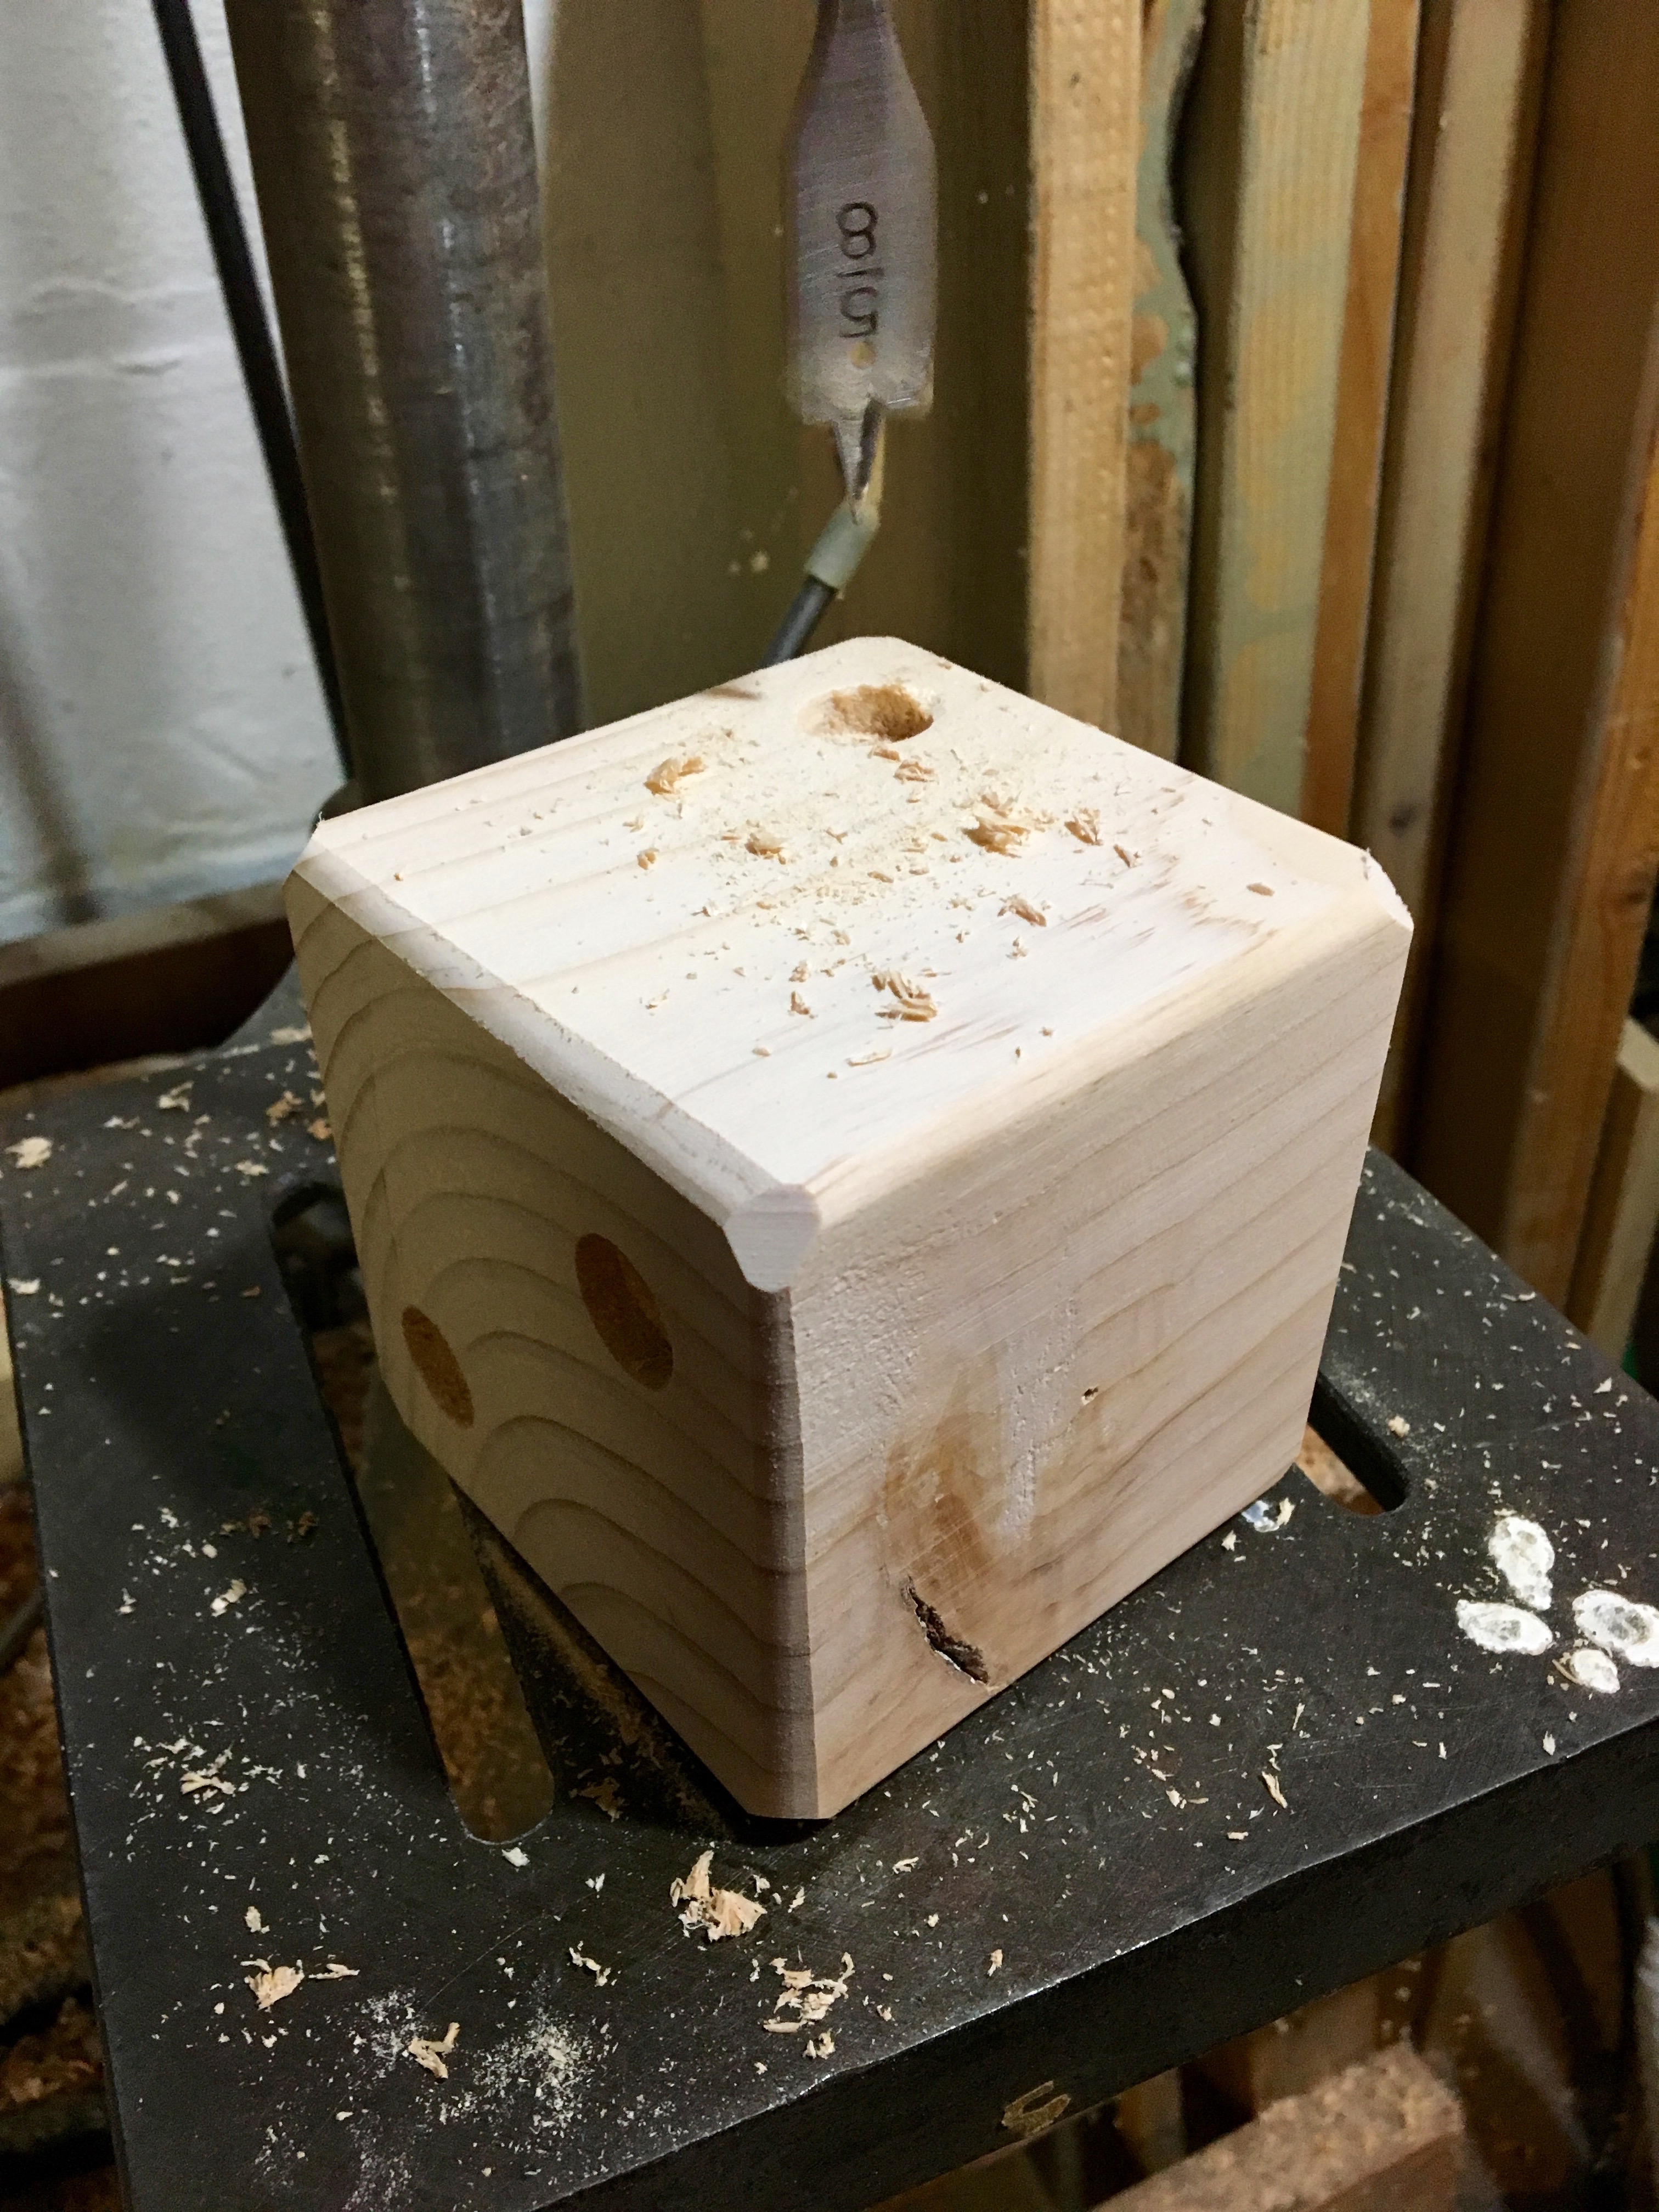
Drill Dots
Punch on dot centers and drill dots using a 5/8″ spade drill bit 1/4″ deep
Finished Die
Need to clean up my work bench…I know
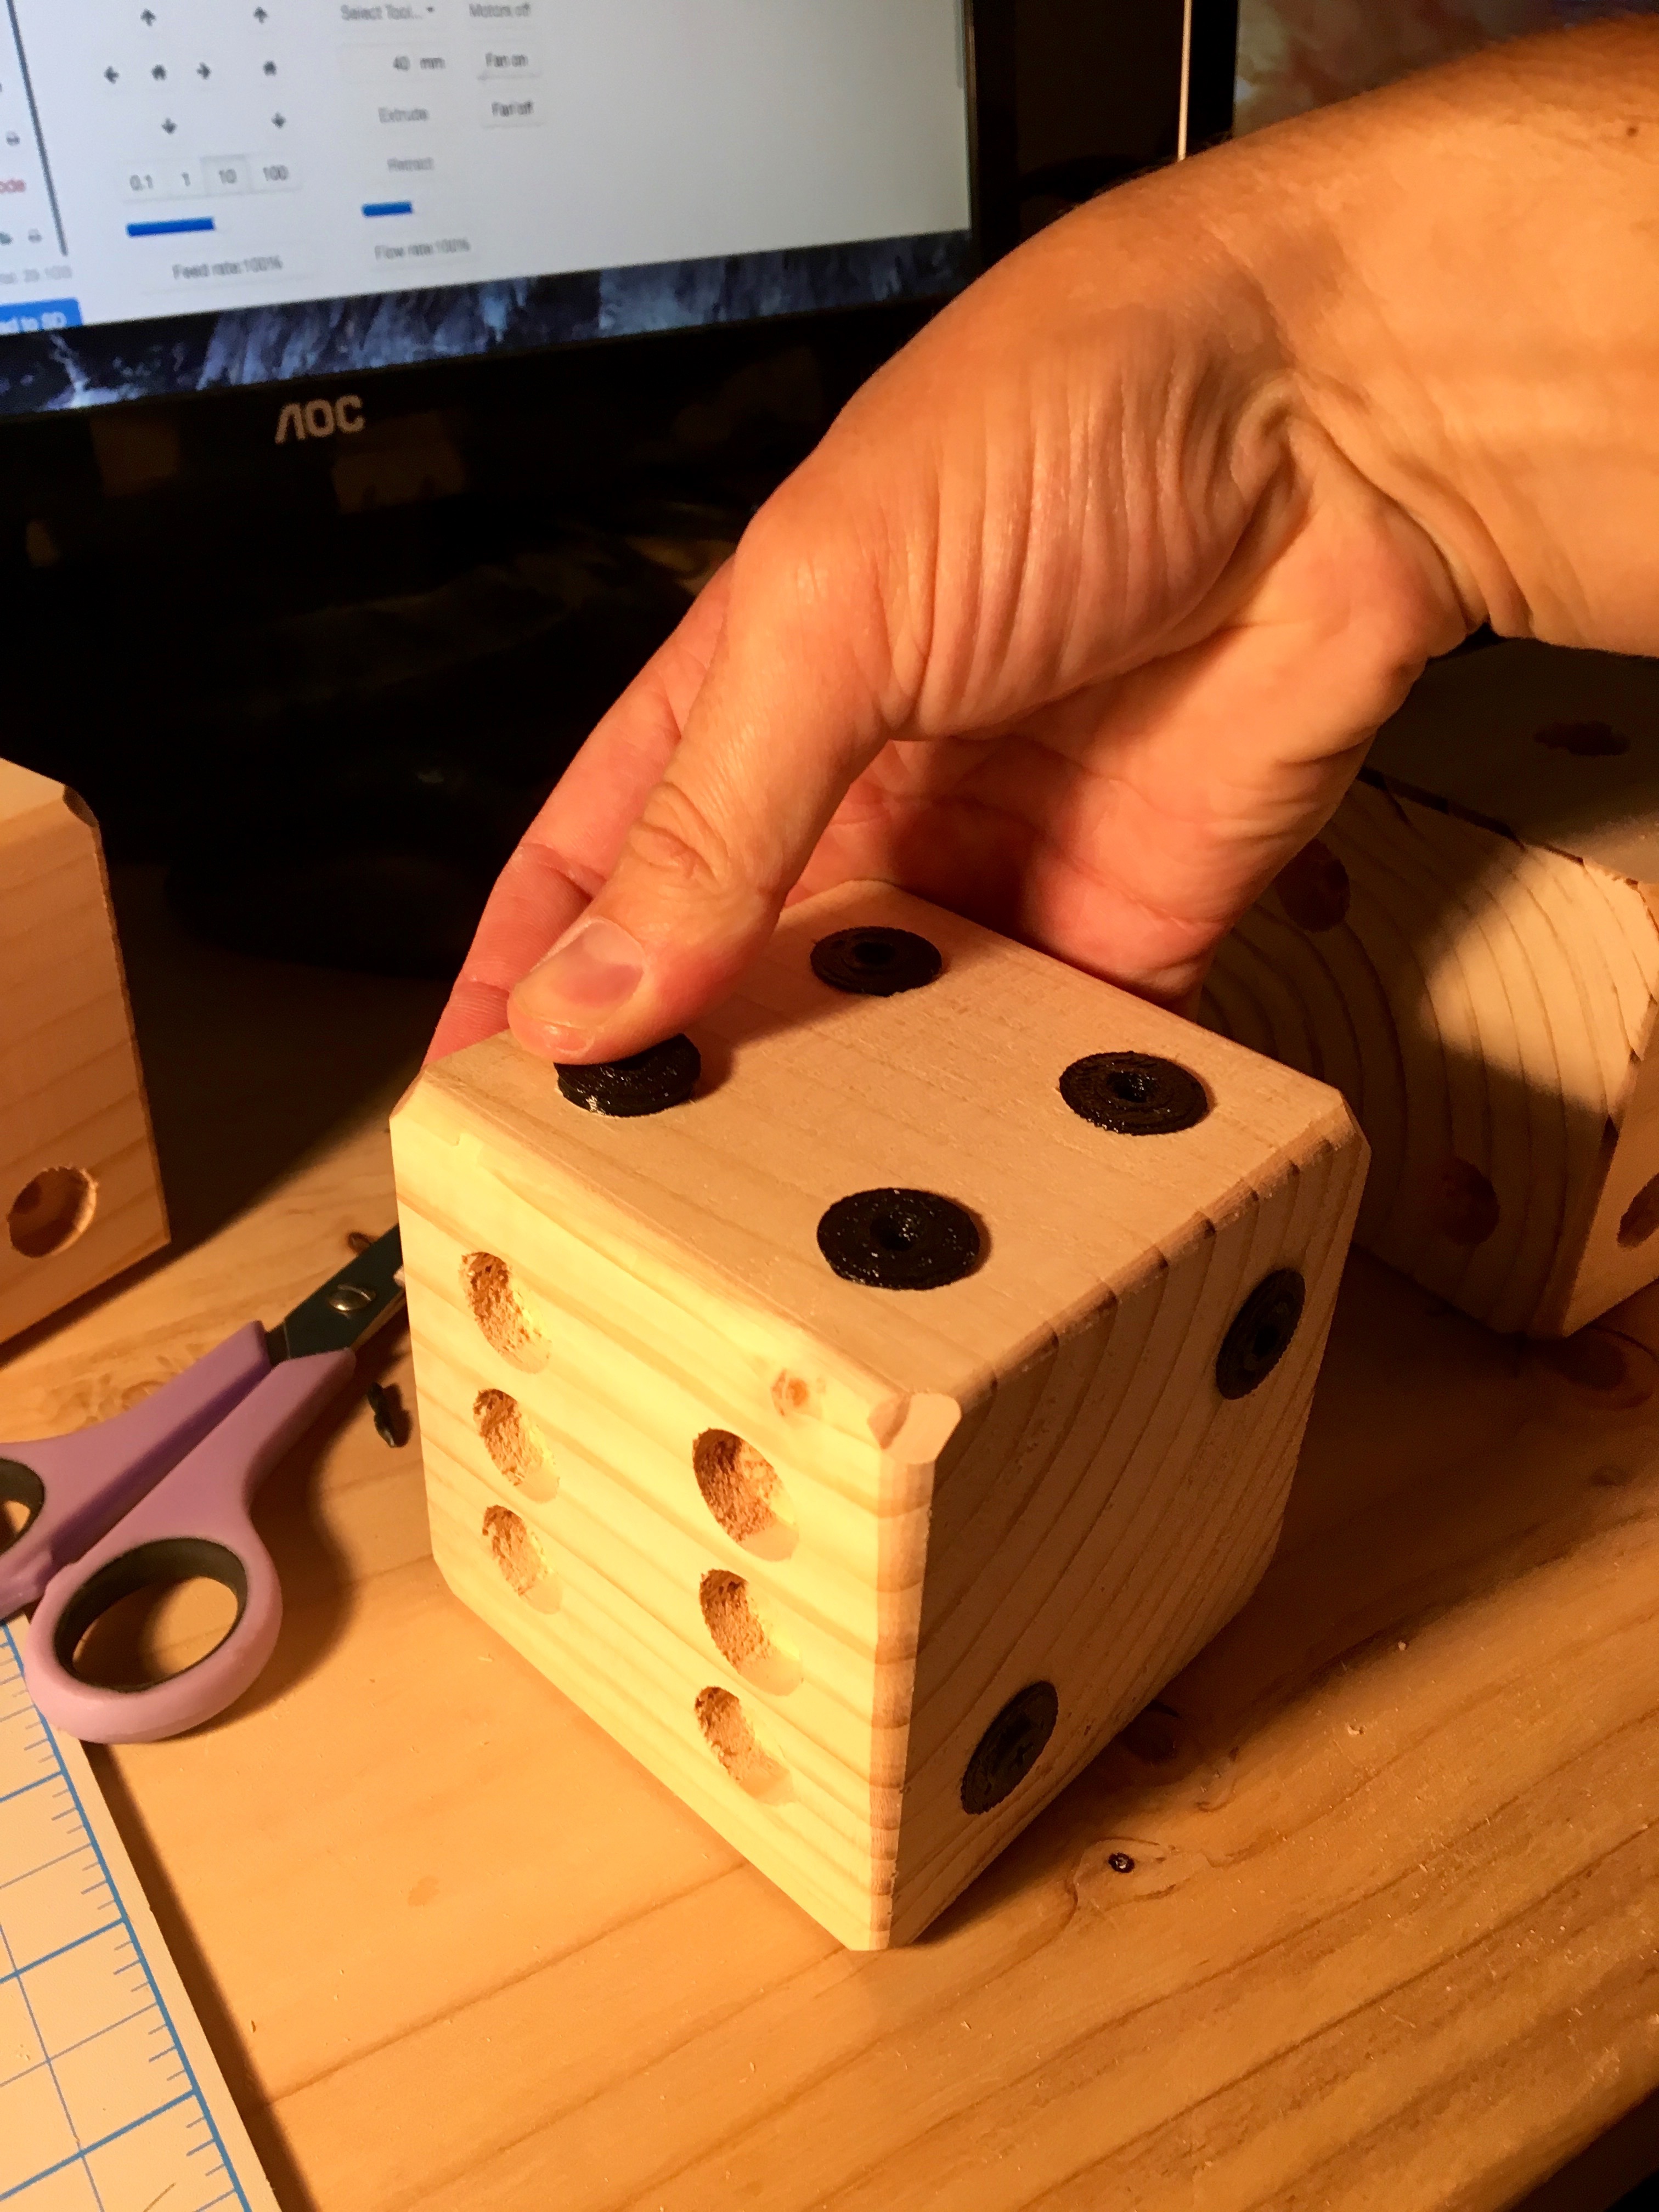
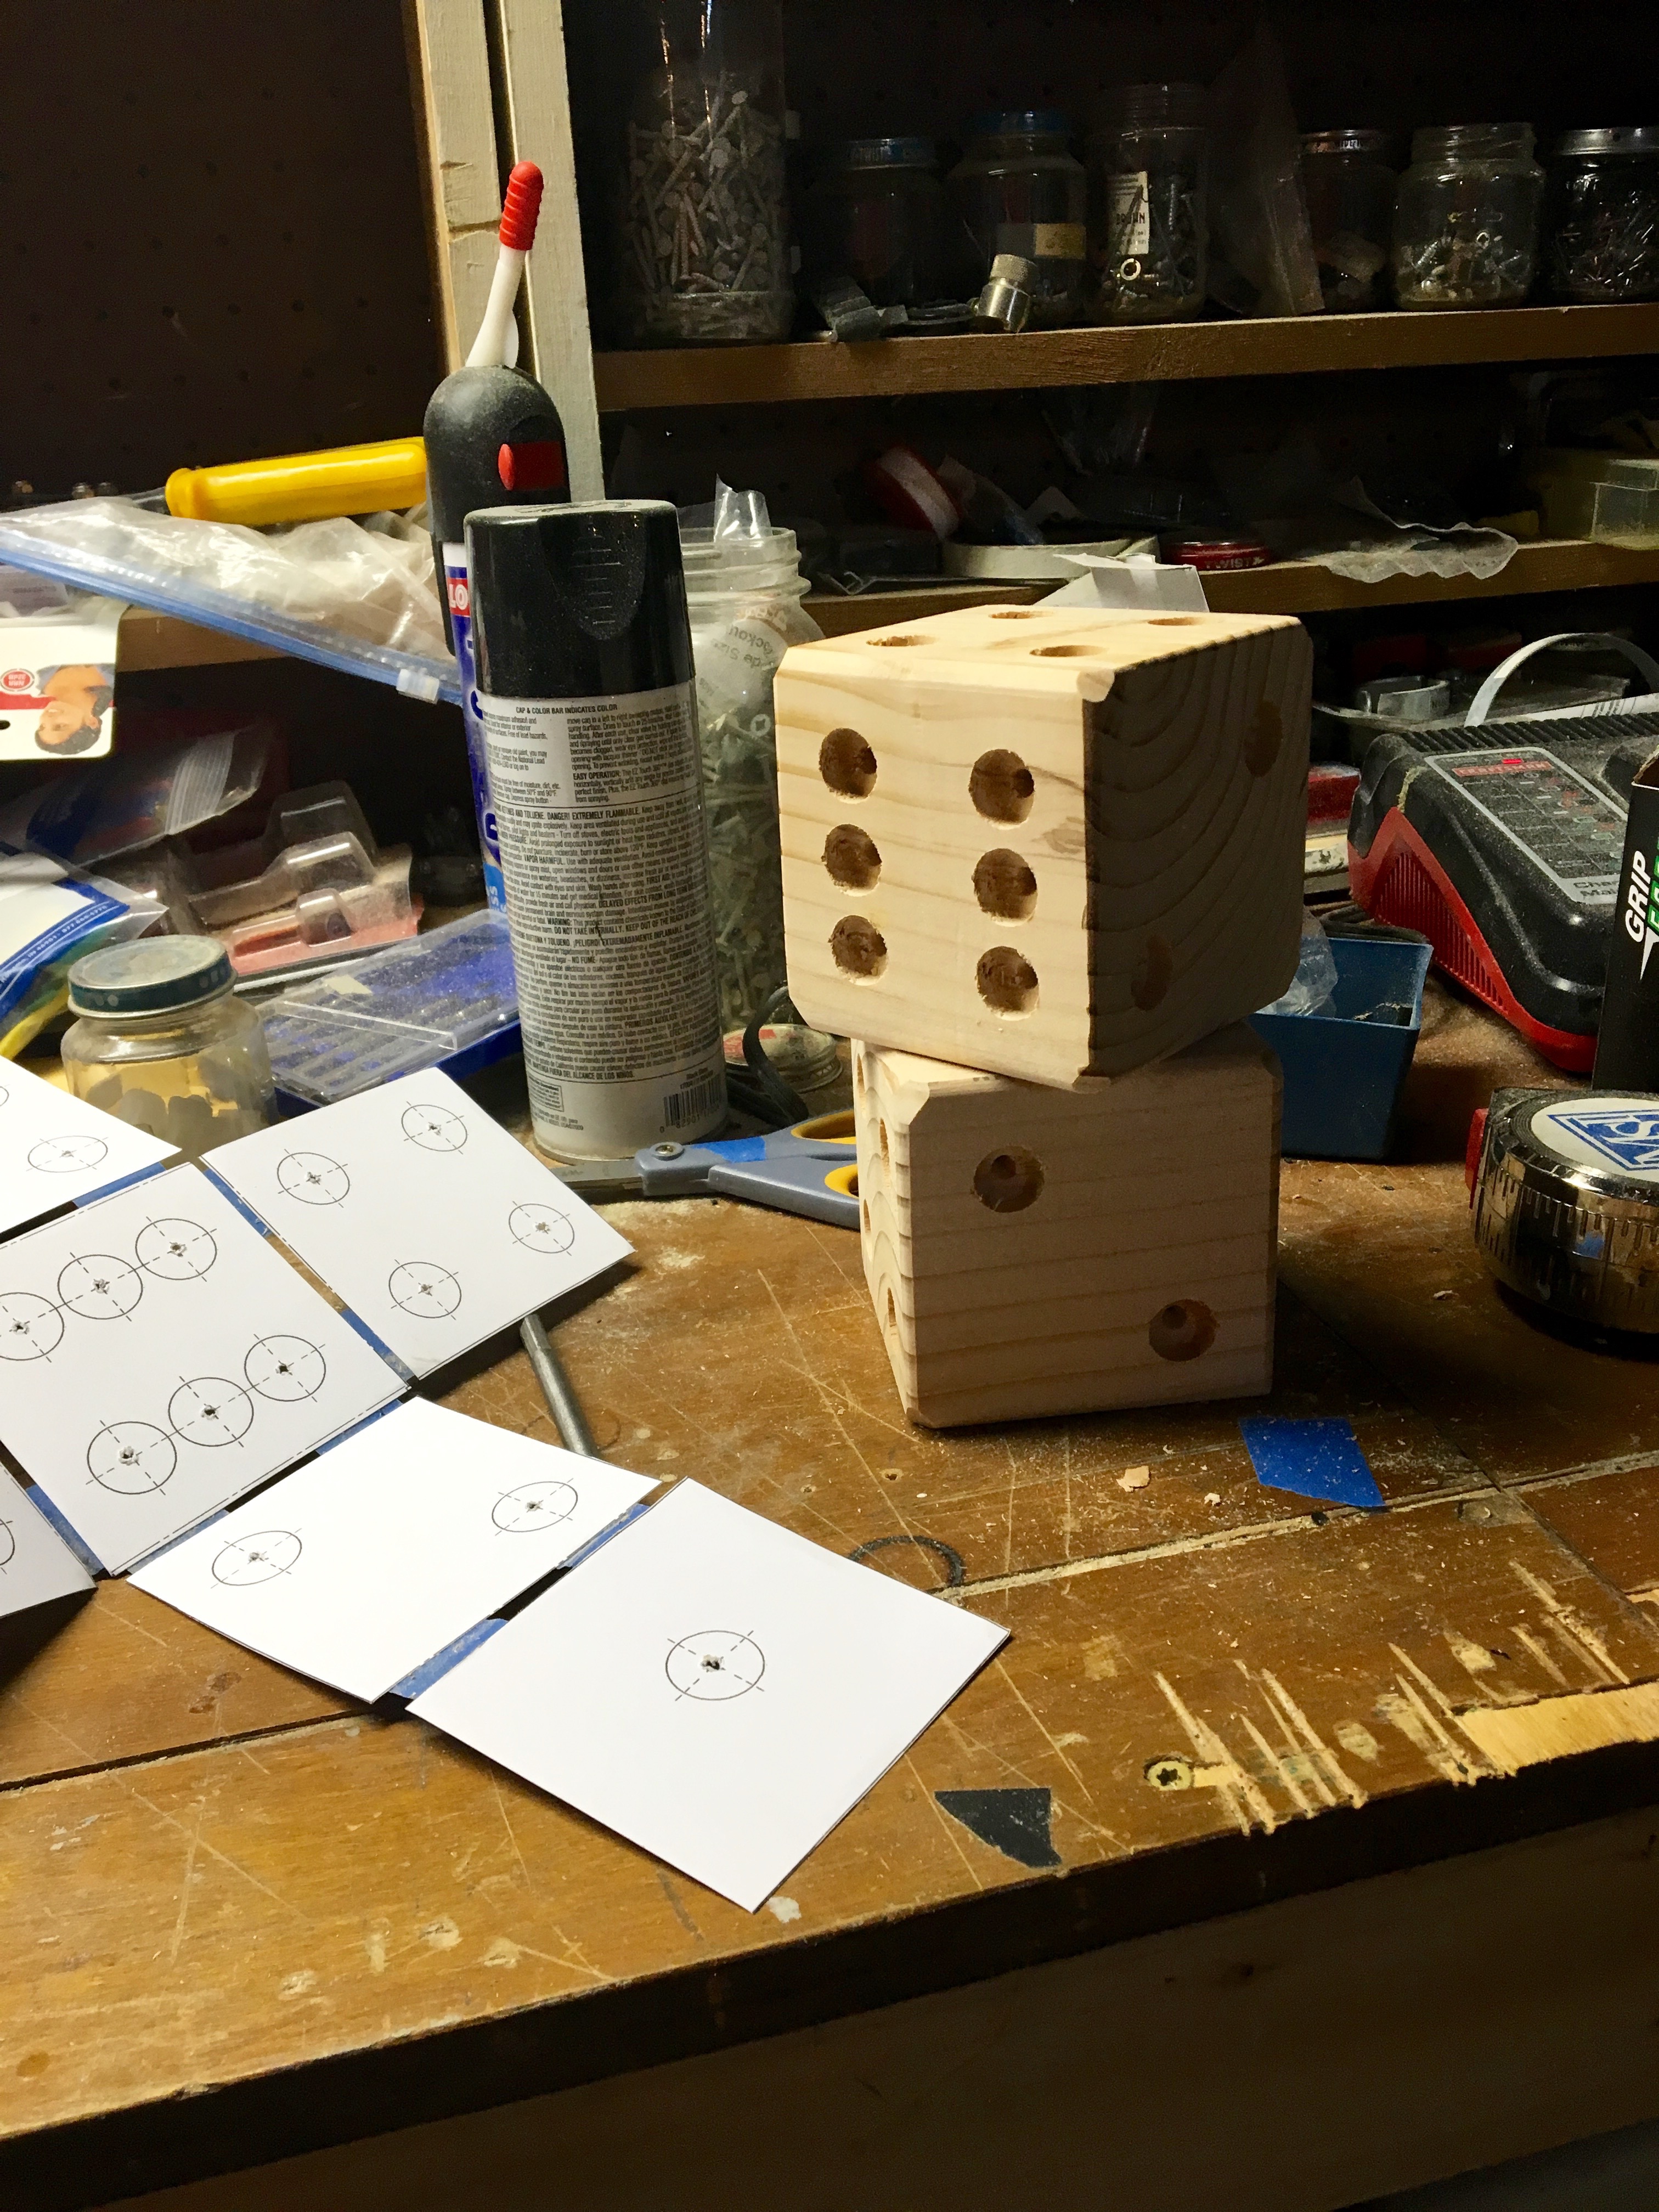
Press Dots
Install dots using a scrap piece of wood and a hammer, secure with #6 x 1″ long screw
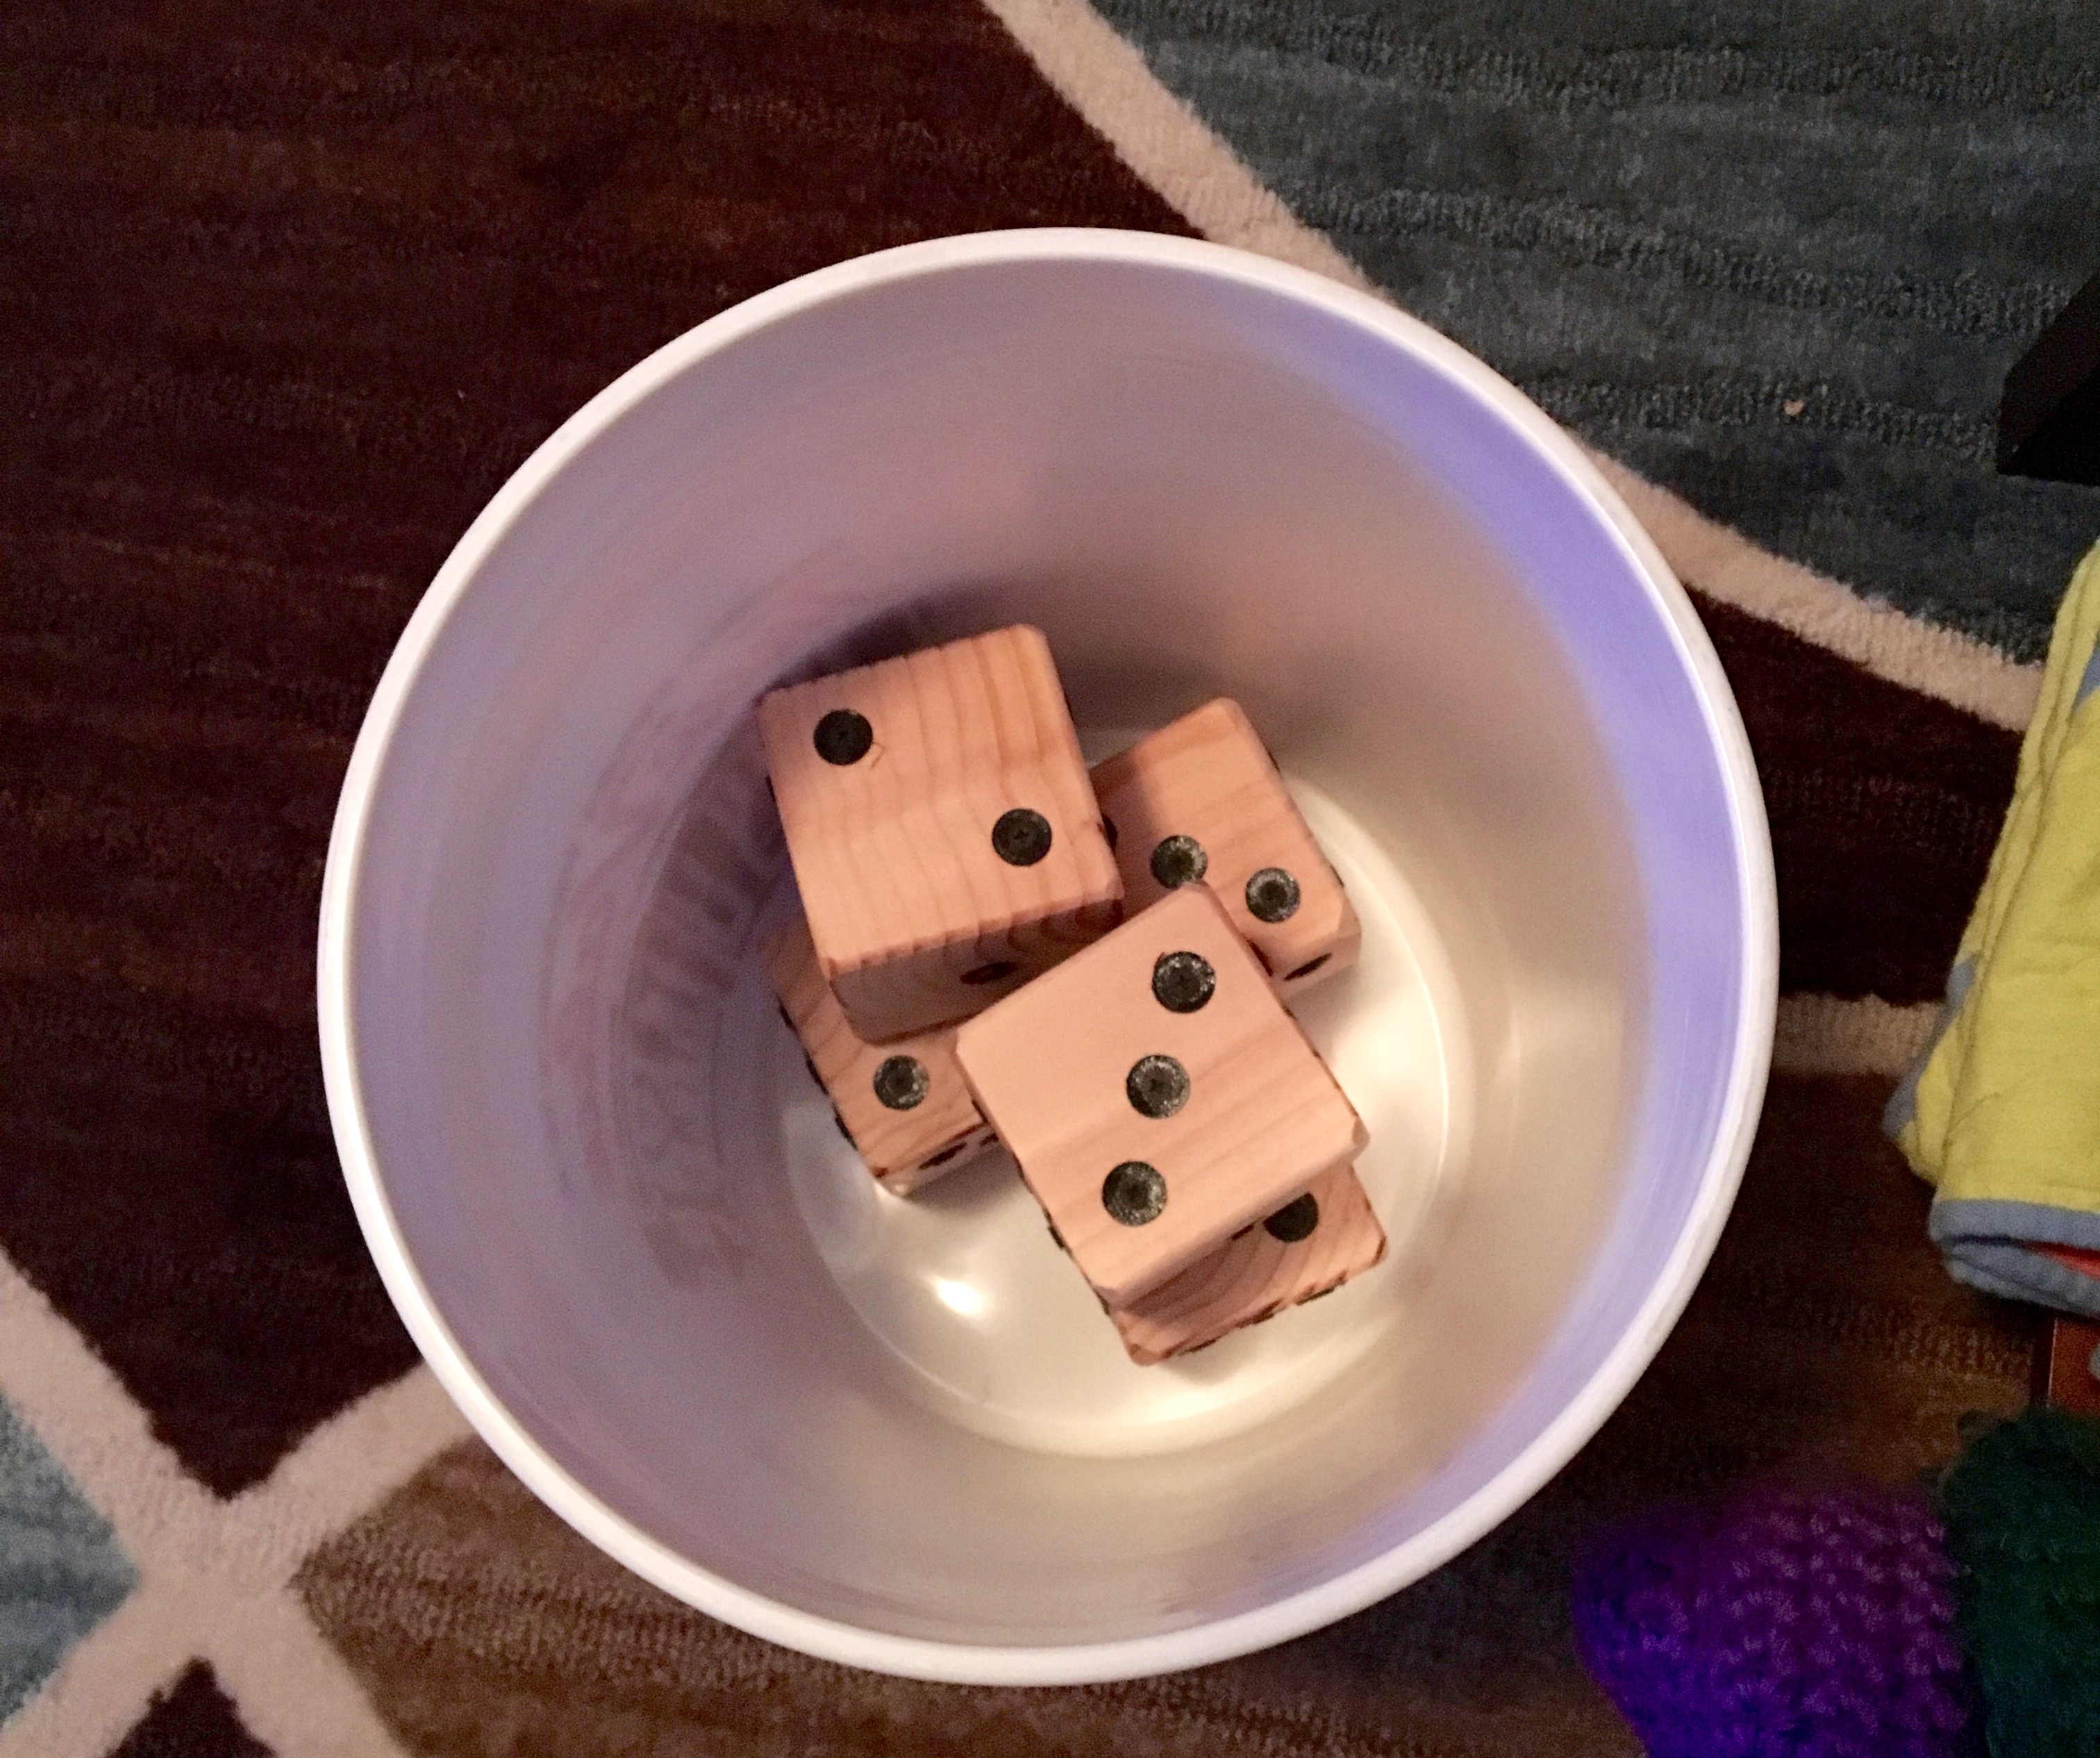
Lawn Dice in Pail
Place in a 5 gallon pail and you’re ready for lawn dice!
PRINTING SETTINGS – DOTS:
-
Fill density: 25-30%
-
Print Speed: 40-50 mm/s
-
Layer height: .15 or .16mm
-
Brim: No, Support: No
-
Orientation: flat side opposite the outer die face on the bed
-
Approximate time: 3-4 hours (if you can print them all in one shot)
ASSEMBLY:
-
Start by printing the dots as they will take a few hours while you head to the hardware store and fetch your 4×4 and other tools you may need. Make sure to pick out a 4×4 with rounded edges, will save you some sanding).
-
Cut the 4×4 using a chop saw into cubes exactly 3.5″ long (remember lumber dimensions are nominal so it’s not 4″).
-
On a belt sander or detail sander smooth the cut surfaces and then round the sharp edges to match the other rounded edges. I also beveled the corners by pushing the cubes into the sander for a bit with the cube at a 45 degree angle from the sand paper.
-
Print out the dice template that I have on Thingiverse along with the dice dots. The full size template can be printed full scale on an 11×17 printer to be actual size or print out the individual die faces on 8.5 x 11 paper. It might be easier to print on the 8.5 x 11 as I had to cut them out of the full size template anyway because it didn’t bend correctly around the cube.
-
Use Scotch tape or masking tape to tape the template pieces together giving approximately an 1/8″ – 3/16″ gap between the template pieces and follow the layout as this represents a true die layout.
-
Fold the template around your cubes and take the spade bit and mark the dot centers on the cube at each dot on the template.
-
Remove the paper template and drill each dot approximately 1/4″ deep (not too deep or you’ll need longer screws).
-
Optional: At this point I batted around the idea to stain the cube and apply a polyurethane finish to seal it, but I needed these for the weekend and ran out of time.
-
Using a scrap piece of wood and a hammer, lightly tap in the 3D printed dots around the cube.
-
Secure each dot by slowly turning a #6 x 1″ long machine screw, going too fast will crack the dot so be careful.
-
Print out the Yahtzee Score sheet and read up on the rules and you’re ready to party!