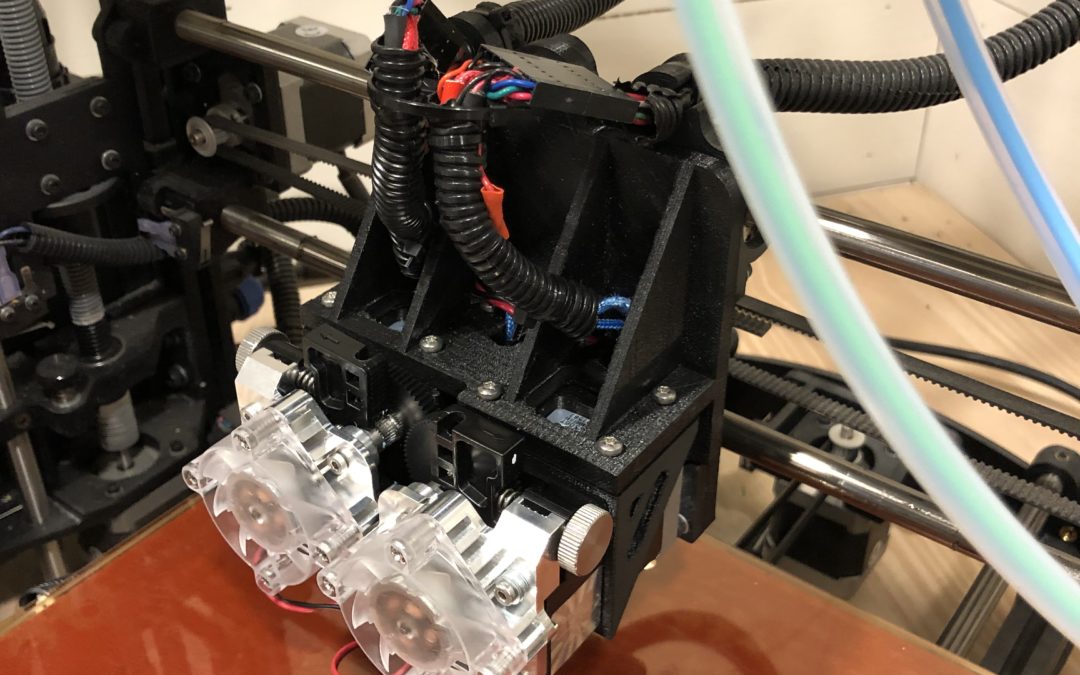
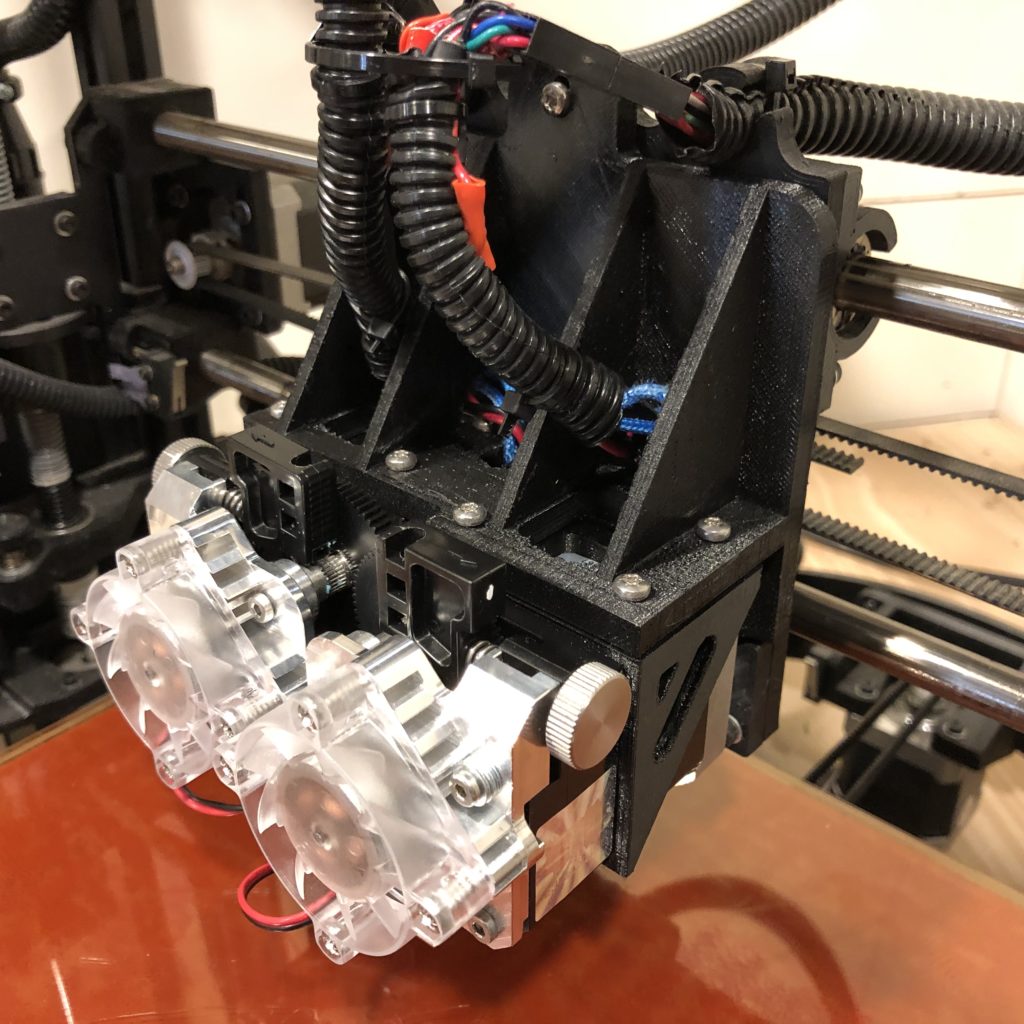
So I realized that I’ve been 3D printing for almost 5 years now and it’s been an awesome adventure! In all that time with the two machines I have, the Ultimaker Original + and the Taz 5 both have been extremely reliable and accurate machines, and the Taz in particular has been a great machine. When I first purchased the Taz I actually bought the V2 dual extruder head right away with the machine and upgraded the single extruder before I even powered it up. At that time my experience with 3D printing was about a year…that was a mistake. You see 3D printing is a lot like life; it’s imperfect and you have to go thru a lot of pain and failed prints to become an expert and while I still have a lot to learn I did learn. After about 3 months of trying to get my dual extruder head to work, I finally gave up and decided it was not worth the heart ache time and again and swapped the single extruder back. What was wrong? Well, a couple things to be honest, the first was heat, the design of the V2 provided very poor cooling to the hexagon hot end with these tiny little fans that would get gunked up with dust and filament stringing and as a result the hotend would experience heat “creep” and jam. The other issue I found was the nozzles were lined up in the y direction instead of next to each other in the x direction, because of this the already heavy extruder now needed a leveling system to get both nozzles level with the bed which added a whole lot more weight to the design. Long story short, I took a look at the new Taz Pro which is a slick machine and maybe it was jealousy but I started to get the itch to revisit dual extrusion. Of course my old V2 was collecting dust in it’s original box and so I decided why not pull it out and upgrade it. Of course the Taz pro Uses the Titan E3d Aero hotend which truly is a great extruder and is so compact! So if you’ve got the same gumption to go pro then follow along!
BILL OF MATERIALS:
1X TAZ DUAL EXTRUDER V2 (that you’re willing to take apart)
1X STANDARD TITAN AERO E3D EXTRUDER & 1X MIRRORED CONFIG – 24V, 3MM –
https://e3d-online.com/titan-aero
8X 3MM TAPERED BRASS HEAT SET INSERTS-
https://www.mcmaster.com/94180a331
8X 3MM X 8MM BUTTON HEAD SCREWS –
https://www.boltdepot.com/Product-Details.aspx?product=6831
PRINTED PARTS: 1X TAZ EXTRUDER BRACKET-DUAL-AERO-TITAN, 2X HALF-HEIGHT-STEPPER-BRACKET –
https://www.thingiverse.com/thing:3609795
Or if you’re building this from scratch (just don’t be scratching while you’re building):
2X HALF HEIGHT STEPPER MOTORS –
https://www.lulzbot.com/store/parts/half-height-nema-17-stepper-motor
2X MOLEX CONNECTORS / PINS
https://itworks3d.com/product/molex-2-row-connector-lulzbot-tool-heads/
https://itworks3d.com/product/connector-pins/
ASSEMBLY / PRINT SETTINGS
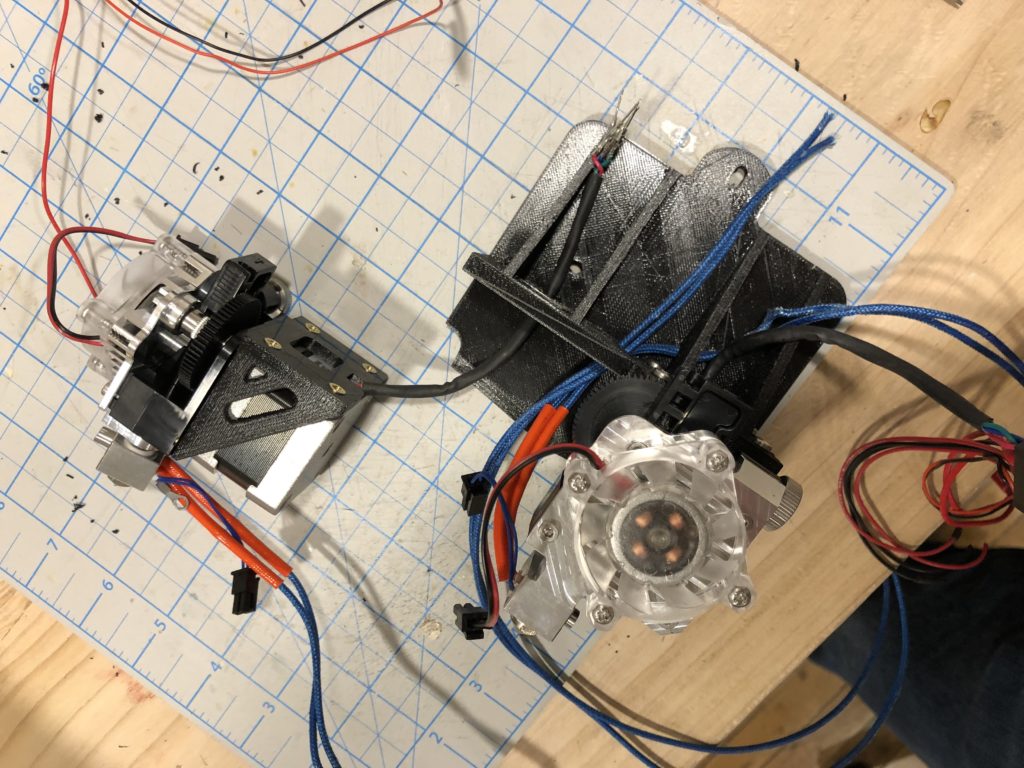
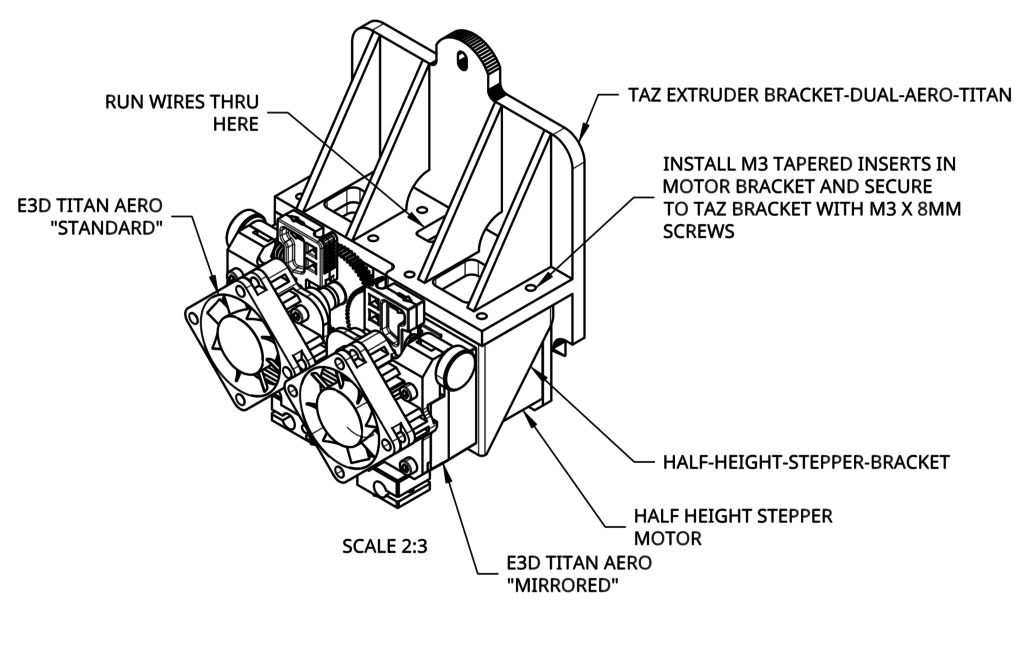
Print the necessary brackets using a high temp material, I used Colorfabb NGEN, but if you use Nylon or another high temp filamant would be a good idea (the motors get hot). Print the motor brackets at 100% infill, and I printed the Taz bracket at 50% infill seemed to work good. Using the Ultimaker I printed without supports and it worked pretty good. Assemble the standard and mirrored configuration of the 3D extruders and then mount them to the bracket.
WIRING / FIRMWARE
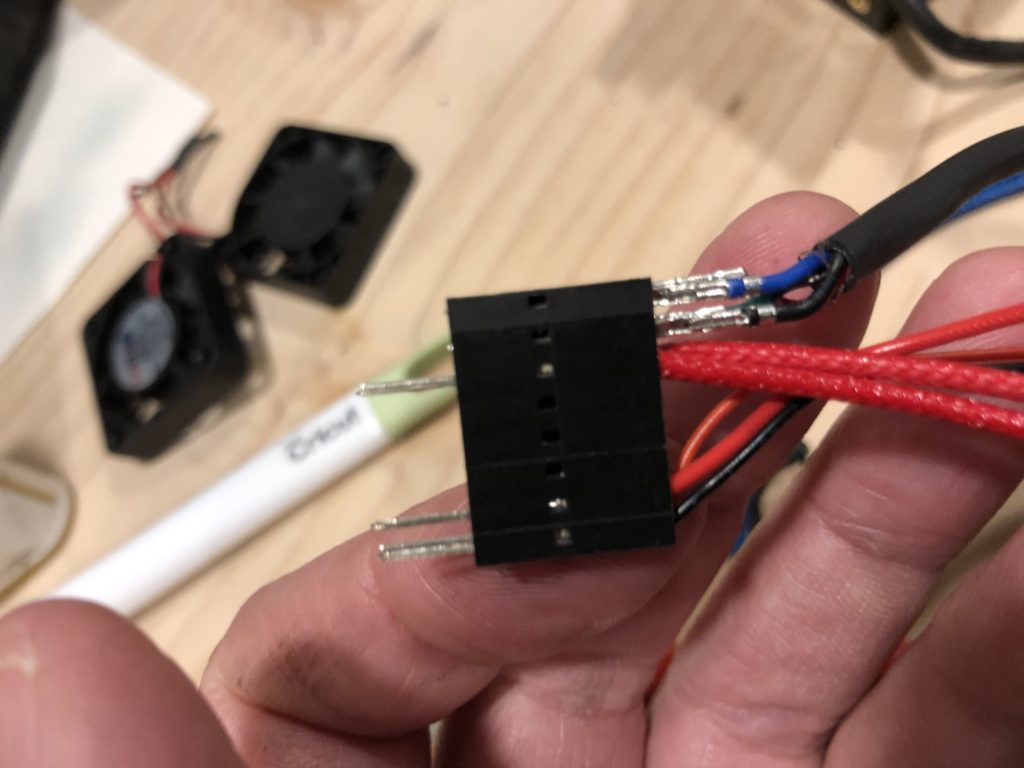
Since I used my existing dual extruders wiring harness, I just simply spliced and soldered the new heater and thermistor wiring to the existing harness after routing it thru the brackets provided openings. For the motors I had to push the pins out of the 16 pin connector and then fish it thru the bracket opening first and then put the pins back into the 16 pin connector. It helps to take a picture of the wiring before you do this so you don’t get lost, of course if you do, refer to the Lulzbot wiring diagram for help,
https://devel.lulzbot.com/retail_parts/TAZ_6_Controller_Box_KT-EL0058/External_Cable_Harnesses/TAZ_Dual_Extruder_Harness.pdf
Because one extruder is mirrored, you will find if you use the standard Taz dual extruder firmware it won’t work because one of the extruders will actually be turning the wrong direction…atleast I did, and trust me it was a bummer. But fear not, there are work-arounds and I found the best way to get it to work was thru firmware tweaks. But holy cow, navigating the firmware settings can be a real challenge as there’s so much to wade thru, I attached my firmware settings that are working great along with the print files on Thingiverse and you can open the Marlin.ino file and flash your printer using Arduino IDE (you can search the windows store for this) , double check this before but for my Taz 5 I found the board needed to be Arduino Mega ADK to communicate. To be honest, what ended up working for me was I took the original Taz dual extruder firmware that Lulzbot published and loaded it into the Marlin configurator which you can find here:
https://github.com/akaJes/marlin-config/releases
There are a lot of packages you need to install including Python (make sure you get the right version), but with a little patience you can do it too.
SLICER OFFSET SETTINGS
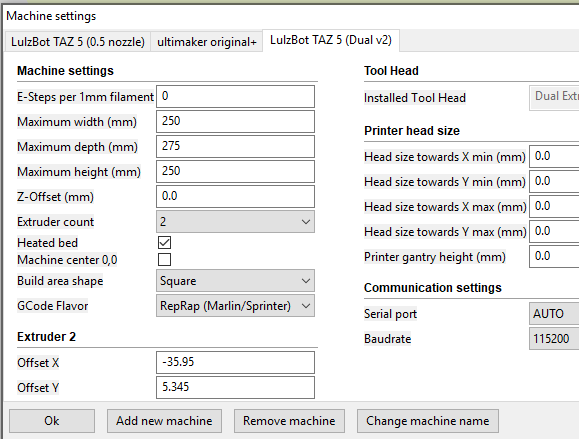
Below are the offsets that are specific to my extruder but should get you in the ballpark, of course the way to calibrate is to print the offset squares which you can find here:
https://ohai.lulzbot.com/project/dual-extruder-tool-head-v2-calibration/accessories/ , measure the difference and adjust. It can take a few trials to do this until you have it dialed in, for me it took 10 prints, a good idea is to write down the measurements you took and then write down the print number so you know which direction you’re going.
Good luck and I hope you enjoy!

